Tilework setup guide: bento tiles, projects and contact
NS. Studio · 2026-10-28
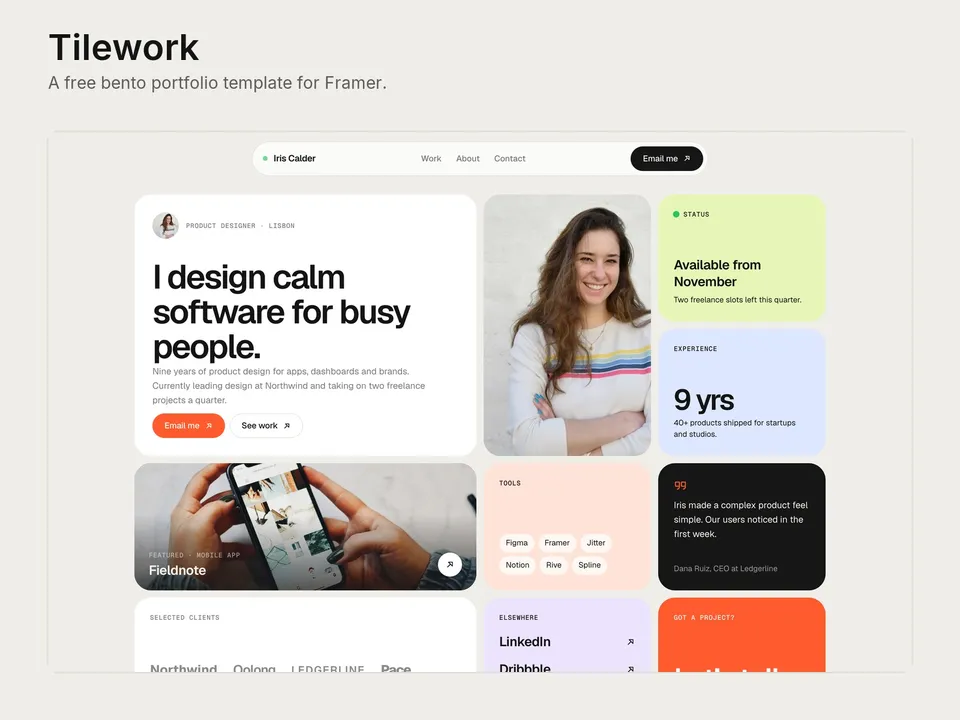
Tilework is a free portfolio with a bento grid home: each tile answers one question a client or hiring manager has. This guide covers what to change after you remix it. Keep the live demo open in another tab to compare.
1. The bento tiles
- Intro: name, role and city, the animated headline and the short description below it.
- Status: "Available from November" and the line under it. Update it whenever your availability changes; it is the tile clients look at first.
- Experience, Featured, Tools, Quote, Selected clients, Elsewhere: edit the text, swap the featured project, and replace the tool names and client names with your own. Replace the quote with a real one, or remove the tile.
- On phones the bento stacks into one column, so check the phone breakpoint after you change the text.
2. Projects in the CMS
Open the CMS from the left panel. The Projects collection has 6 example case studies; each is a card in "Selected work" and its own page under /work/.
- Fill in client, role, year, the cover, the challenge, the approach and the outcome.
- The result tile is one big number or short phrase; make it something you can stand behind.
- Each project has two gallery images. Use images at least 1600 px wide.
- Fill in the SEO title and description for each project so the case-study pages show up well in search.
3. About and experience
Rewrite the "Designer first, builder second" text and the experience rows.
4. Contact
- Change the email address in the contact block, the "Email me" button in the floating navigation and the "Let's talk" tile. Each is a
mailto:link you edit in the right panel. - Prefer calls? Point "Let's talk" at a scheduling link instead.
- Update the LinkedIn, Dribbble and Instagram links.
5. Colours and type
Tilework uses colour and text styles, so a rebrand takes minutes: change the colour styles in the Assets panel and every tile follows. The fonts are Geist and Geist Mono.
Publish and connect your domain
Click Publish to go live on a free framer.website address. To use your own domain, upgrade the project to a Framer site plan, open Site Settings, Domains, add the domain and copy the DNS records Framer shows into your domain registrar. It usually works within an hour.
Before you publish, open Site Settings, General and replace the title, description and social image with your own, so search results and link previews show your name and not the demo's.
Tools that help
- Cal.com for the "Let's talk" tile: a free scheduling link synced with your calendar, so clients can book an intro call instead of writing an email. New users get 20% off for 12 months through our link.
- Mobbin for case-study research: a library of real app and web screens to benchmark against when you explain your design decisions.
Some links on this page are affiliate links. If you sign up, NS. Studio may earn a commission at no extra cost to you.
Want more?
Gouache is our paid portfolio for illustrators and artists. If you'd rather not set Tilework up yourself, template setup starts at $79.